
Eclipse Timelapse Planner
Shooting a solar eclipse is tricky, but a very worthwhile experience, so let’s preconfigure your GoPro so you can enjoy the rare event live and after with a cool timelapse capture.
TL;DR
There is an automatic time lapse calculator and generator at the bottom of this page, designed to get the most from your Solar Eclipse.
The Geeky Details
The first tricky issue when shooting a solar eclipse is the sheer change in dynamic range from full sun to when it’s fully covered by the moon, the light level can vary up to 12 stops. 12 stops, the light halving in brightness 12 times, would be the difference in shooting with 1/1000 shutter to a 4 second exposure. This example data was from a solar eclipse measured in Australia in 2023 (thanks to Matt Parker’s data from Stand-up Maths - the whole video is a worth watch.)
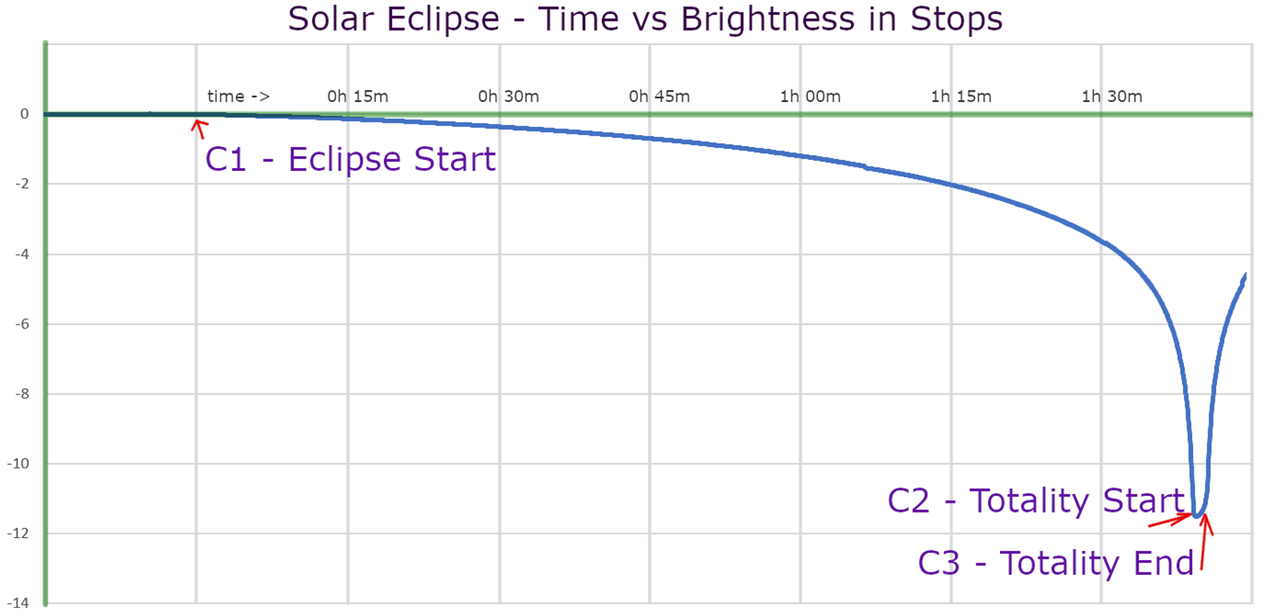
The light levels change very slowly initially, but incredibly rapidly as the totality approaches. The first 90 minutes, the light drops only 3-4 stops, you will notice the light feels odd after 90 minutes, but your camera will have compensated so much to make it mostly unnoticeable. We can improve on the default camera behavior using Labs firmware.
GoPro Night Lapse
A stock GoPro has a great night-lapse feature designed for day to night to day transitions, keeping a good exposure throughout, yet this exposure logic is not ideal for a solar eclipse before and after the totality (it is fine during totality.) None of the time-lapse modes on GoPro have an exposure lock option, but with a potential 12-stop change, locking the shutter 1/1000 and ISO at 100 (or exposing correctly at C1) will result in a mostly black image at C2. So we still need some of the autoexposure goodness, but with some constraints so that the light drop is more visibly dramatic.
GoPro Labs Firmware
Brand new to Labs? Get the firmare and info on Labs installation
Extension - EXPS
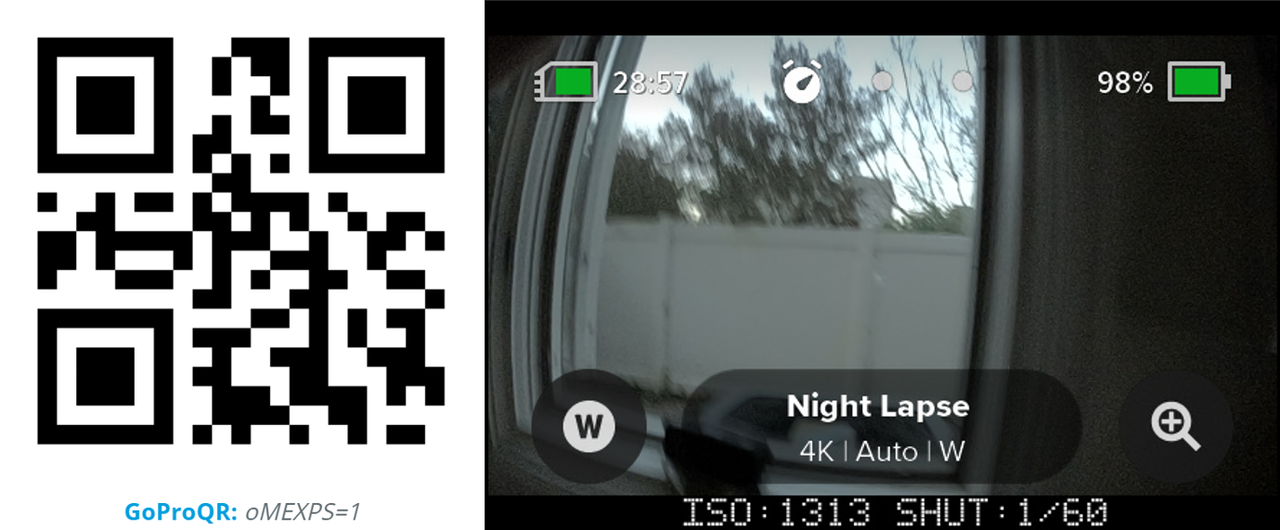
Things to try with GoPro Labs. oMEXPS=1 this will display ISO and shutter for your current shooting mode. Test with time-lapse or night-lapse, recording to see the exposure
for different light levels. Practice well before the eclipse. This feature requires the latest Labs firmware on HERO11 thru HERO13 to view exposure during a timelapse
(it works only in video modes on older releases.)
Note: The exposure settings for preview can be different than when recording, so experiment while capturing a timelapse.
Extension - EXPX
Once you see the shutter behavior with Labs extension above, we can now consider setting an upper limit to the shutter with oMEXPX=<your maximum shutter time>.
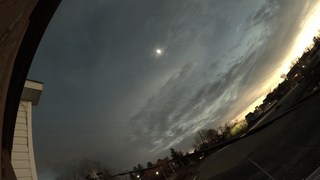
Below are extracted frames from two simultaneous Night Lapse captures of the sunset, one with the shutter limited to 1/50th of a second.

Limiting the ISO to 100 is also our recommendation for shooting the eclipse, as we estimate that from full daylight to totality, the shutter will range from around 1/1600th to 2.5 seconds at 100 ISO. Fitting nicely within Night Lapse with a 4-second interval, with an Auto shutter.
It is tricky to capture both the massive drop in light, and the drama of totality, in a single timelapse capture. If possible, this is best achieved with multiple cameras, editing and blending the results in post.
Type 1 - Capture mostly optimized for the totality
This also works with a stock camera (non-Labs), and it is a decent option. Night Lapse ISO 100, 4s interval, Shutter Auto. If you started 15 minutes before totality and stopped 15 minutes after, the result is a ~17 second timelapse, with 2 seconds in totality (if a 4-minute totality.)
Type 2 - Capture optimized for the drop in brightness
Timelapse ISO 100, 10s interval, but limiting the shutter to 1/30th of a second (a creative choice, my best guess.) The requires Labs firmware to control the exposure limit via the EXPX extension. At 1/30, the last 5-6 stops of the eclipse will be more dramatically show the light impact upon the landscape. Capturing one hour before and after totality, the result is a ~25 second timelapse, ~1 second in totality.
Note: Timelapse (not Night Lapse) is limited to a maximum of 1/8 second exposures, combined with ISO maximum of 100, this is also a good option without Labs firmware. This is what I used in 2017. However, the now only the last 3-4 stops will show a dramatic light change, and this is in the last minute before and after totality, and with a 10s interval, you will only get about six frames of the light drop in the timelapse (quarter second at playback speed.) Using the 1/30th limit, the estimated length of the light drop-off will double in the final timelapse.
Type 3 - Super optimized for the totality
Night Lapse ISO Max 800, Min 100, Auto interval, Shutter Auto, Labs shutter limited to 1s. Auto shutter with Auto interval is a special mode in Night Lapse, in this mode it will take frames as fast as possible,
giving you more frames in the totality. When it is bright, this is ~3fps, when it is dark Labs firmware can limit the exposure time to 1fps. If you have 4 minutes of totality, and only 2 minutes before and after,
this 8-minute timelapse will result in ~32s playback time, with 4 seconds in the totality in playback. Optional, you could limit the exposure to half a second for up to 8 seconds in totality.
Type 4 - Combining 2 & 3
For those who want to experiment further, Labs firmware allows you to script the camera, so that certain modes or actions can be performed at particular moments. The problem is we haven’t had a prior eclipse to practice these extensions on. The very experimental script would be to run type 2) capture until the first second of totality, then switch to type 3), automatically creating two separate video timelapses.
2024 Example of Type 4 (starting at Type 2 and ending in Type 3.)
Example from user Scotty MacPherson shooting with HERO11 running Labs v2.30.70.
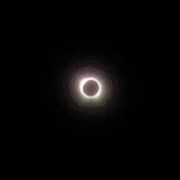
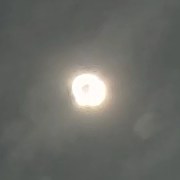
Totality exposure of Type 2
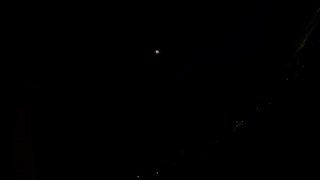
Totality exposure of Type 3
Troubleshooting and Advance Configurations
All of Labs features use the Pro Mode on your Black addition camera. In Pro Mode you can change a lot of settings, but to keep these scripts from getting too complex, some assumptions have been made that the settings are close to the system defaults. The script below assume your camera has time-lapse Video and night-lapse Video presets. Camera in default configurations have these modes, however the presets can be changed to Photo time-lapse and Photo night-lapse. If you have changed these, either manually change them back to Video type or do a factory reset on the camera, then reenable Pro Mode.
None of the scripts will change the default color look or EV settings. So if unchanged the timelapse captures will be Color Natural at EV 0.0, which is perfectly fine.
However if you intend to apply some color correction, setting Color Flat and EV to -0.5 is recommended. Set these properties within the time-lapse and night-lapse Video presets.
Eclipse Time-lapse QR Code
Set up an automatic action via QR Code, so you can ready your camera well in advance, and it will automatically turn on and record with your desired time and settings.
Find 2024 eclipse times for your location
Setup A thru D options:
4s interval, add mins before and after totality
10s interval, add mins before and after totality
~0.5s interval, add mins before and after totality
H11 12-13 H11 12-13
Estimated Timelapse Playback Length: seconds
Forum to discuss the best settings, and to share your resulting videos.
Note: don't save a QR Code image with this enabled. This is designed to for live QR Codes, not printed or saved to camera rolls.
GoProQR:
Share this QR Code as a URL:
Compatibility: Labs enabled HERO11-13 (likely some support with older Labs enabled cameras, please test.)
updated: September 10, 2024
More features for Labs enabled cameras