Tutorial 7: Send WiFi Commands
This document will provide a walk-through tutorial to perform Open GoPro HTTP Operations with the GoPro.
This tutorial only considers sending these commands as one-off commands. That is, it does not consider state management / synchronization when sending multiple commands. This will be discussed in a future tutorial.
There are two types of responses that can be received from the HTTP commands: JSON and binary. This section will deal with commands that return JSON responses. For commands with binary responses (as well as commands with JSON responses that work with the media list), see the next tutorial.
Requirements
It is assumed that the hardware and software requirements from the connecting BLE tutorial are present and configured correctly.
The scripts that will be used for this tutorial can be found in the Tutorial 7 Folder.
Just Show me the Demo(s)!!
-
Each of the scripts for this tutorial can be found in the Tutorial 7 directory.
Python >= 3.9 and < 3.12 must be used as specified in the requirementsYou must be connected to the camera via WiFi as stated in Tutorial 6.You can test querying the state of your camera with HTTP over WiFi using the following script:
$ python wifi_command_get_state.pySee the help for parameter definitions:
$ python wifi_command_get_state.py --help usage: wifi_command_get_state.py [-h] Get the state of the GoPro (status and settings). optional arguments: -h, --help show this help message and exitYou can test enabling the UDP preview stream with HTTP over WiFi using the following script:
$ python wifi_command_preview_stream.pySee the help for parameter definitions:
$ python wifi_command_preview_stream.py --help
usage: wifi_command_preview_stream.py [-h]

Enable the preview stream.

optional arguments:
  -h, --help  show this help message and exit
Once enabled the stream can be viewed at
udp://@:8554(For more details see the View Stream tab in the Preview Stream section below.You can test sending the load preset group command with HTTP over WiFi using the following script:
$ python wifi_command_load_group.pySee the help for parameter definitions:
$ python wifi_command_load_group.py --help usage: wifi_command_load_group.py [-h] Load the video preset group. optional arguments: -h, --help show this help message and exitYou can test sending the Set Shutter command with HTTP over WiFi using the following script:
$ python wifi_command_set_shutter.pySee the help for parameter definitions:
$ python wifi_command_set_shutter.py --help usage: wifi_command_set_shutter.py [-h] Take a 3 second video. optional arguments: -h, --help show this help message and exitYou can test setting the resolution setting with HTTP over WiFi using the following script:
$ python wifi_command_set_resolution.pySee the help for parameter definitions:
$ python wifi_command_set_resolution.py --help usage: wifi_command_set_resolution.py [-h] Set the video resolution to 1080. optional arguments: -h, --help show this help message and exit -
The Kotlin file for this tutorial can be found on Github.
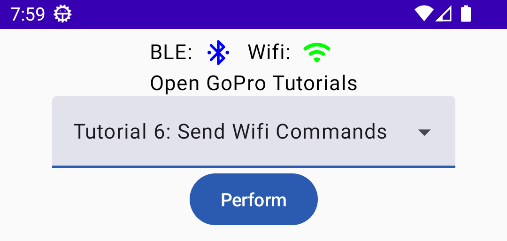
To perform the tutorial, run the Android Studio project, select “Tutorial 7” from the dropdown and click on “Perform.” This requires:
- a GoPro is already connected via BLE, i.e. that Tutorial 1 was already run.
- a GoPro is already connected via Wifi, i.e. that Tutorial 5 was already run.
You can check the BLE and Wifi statuses at the top of the app.

Perform Tutorial 7 This will start the tutorial and log to the screen as it executes. When the tutorial is complete, click “Exit Tutorial” to return to the Tutorial selection screen.
Setup
We must first connect to The GoPro’s WiFi Access Point (AP) as was discussed in the Connecting to Wifi tutorial.
Sending HTTP Commands with JSON Responses
Now that we are are connected via WiFi, we can communicate via HTTP commands.
-
We will use the requests package to send the various HTTP commands.
We are building the endpoints using the GOPRO_BASE_URL defined in the tutorial package’s__init__.py -
We are using ktor for the HTTP client. We are using an abstracted
getfunction from ourWificlass to send get requests as such:private val client by lazy { HttpClient(CIO) { install(HttpTimeout) } } suspend fun get(endpoint: String, timeoutMs: Long = 5000L): JsonObject { Timber.d("GET request to: $endpoint") val response = client.request(endpoint) { timeout { requestTimeoutMillis = timeoutMs } } val bodyAsString: String = response.body() return prettyJson.parseToJsonElement(bodyAsString).jsonObject }
Both Command Requests and Setting Requests follow the same procedure:
- Send HTTP GET command to appropriate endpoint
- Receive confirmation from GoPro (via HTTP response) that request was received.
- GoPro reacts to command
Get Camera State
The first command we will be sending is Get Camera State. This command will return all of the current settings and values. It is basically a combination of the Get All Settings and Get All Statuses commands that were sent via BLE. Since there is no way to query individual settings / statuses via WiFi (or register for asynchronous notifications when they change), this is the only option to query setting / status information via WiFi.
The command writes to the following endpoint:
/gopro/camera/state
Let’s build the endpoint then perform the GET operation and check the response for errors. Any errors will raise an exception.
-
url = GOPRO_BASE_URL + "/gopro/camera/state"response = requests.get(url) response.raise_for_status() -
var response = wifi.get(GOPRO_BASE_URL + "gopro/camera/state")
Lastly, we print the response’s JSON data:
-
logger.info(f"Response: {json.dumps(response.json(), indent=4)}")The response will log as such (abbreviated for brevity):
INFO:root:Getting GoPro's status and settings: sending http://10.5.5.9:8080/gopro/camera/state INFO:root:Command sent successfully INFO:root:Response: { "status": { "1": 1, "2": 2, "3": 0, "4": 255, "6": 0, "8": 0, "9": 0, "10": 0, "11": 0, "13": 0, "14": 0, "17": 1, ... "settings": { "2": 9, "3": 1, "5": 0, "6": 1, "13": 1, "19": 0, "24": 0, "30": 0, "31": 0, "32": 10, "41": 9, "42": 5, -
Timber.i(prettyJson.encodeToString(response))The response will log as such (abbreviated for brevity):
Getting camera state
GET request to: http://10.5.5.9:8080/gopro/camera/state
{
    "status": {
        "1": 1,
        "2": 4,
        "3": 0,
        "4": 255,
        "6": 0,
        "8": 0,
        "9": 0,
        "10": 0,
        "11": 0,
        "13": 0,
    ...
        "113": 0,
        "114": 0,
        "115": 0,
        "116": 0,
        "117": 31154688
    },
    "settings": {
        "2": 9,
        "3": 1,
        "5": 0,
        "6": 1,
        "13": 1,
        ...
        "177": 0,
        "178": 1,
        "179": 3,
        "180": 0,
        "181": 0
    }
}
We can see what each of these values mean by looking at relevant documentation in the settings or status object of the
State schema.
For example (for settings):
- ID 2 == 9 equates to Resolution == 1080
- ID 3 == 1 equates to FPS == 120
Load Preset Group
The next command we will be sending is Load Preset Group, which is used to toggle between the 3 groups of presets (video, photo, and timelapse). The preset groups ID’s are:
| Command | Bytes |
|---|---|
| Load Video Preset Group | 1000 |
| Load Photo Preset Group | 1001 |
| Load Timelapse Preset Group | 1002 |
-
url = GOPRO_BASE_URL + "/gopro/camera/presets/set_group?id=1000"response = requests.get(url) response.raise_for_status() -
response = wifi.get(GOPRO_BASE_URL + "gopro/camera/presets/load?id=1000")
Lastly, we print the response’s JSON data:
-
logger.info(f"Response: {json.dumps(response.json(), indent=4)}")This will log as such:
INFO:root:Loading the video preset group: sending http://10.5.5.9:8080/gopro/camera/presets/set_group?id=1000 INFO:root:Command sent successfully INFO:root:Response: {} -
Timber.i(prettyJson.encodeToString(response))The response will log as such:
Loading Video Preset Group
GET request to: http://10.5.5.9:8080/gopro/camera/presets/load?id=1000
{
}
Lastly, we print the response’s JSON data:
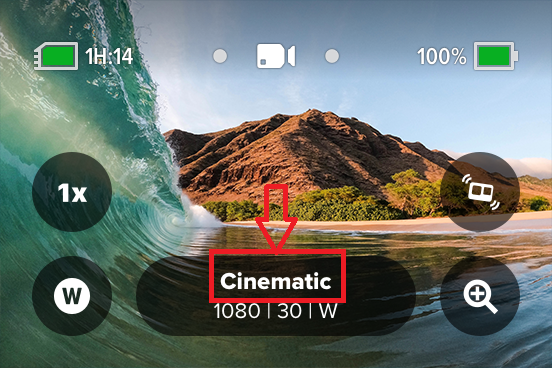
You should hear the camera beep and switch to the Cinematic Preset (assuming it wasn’t already set). You can verify this by seeing the preset name in the pill at bottom middle of the screen.

Set Shutter
The next command we will be sending is Set Shutter. which is used to start and stop encoding.
-
url = GOPRO_BASE_URL + f"/gopro/camera/shutter/start"response = requests.get(url) response.raise_for_status() -
response = wifi.get(GOPRO_BASE_URL + "gopro/camera/shutter/start")
Lastly, we print the response’s JSON data:
This will log as such:
-
INFO:root:Turning the shutter on: sending http://10.5.5.9:8080/gopro/camera/shutter/start INFO:root:Command sent successfully -
Timber.i(prettyJson.encodeToString(response))The response will log as such:
Setting Shutter On
GET request to: http://10.5.5.9:8080/gopro/camera/shutter/start
{
}
We can then wait a few seconds and repeat the above procedure to set the shutter off using gopro/camera/shutter/stop.
Set Setting
The next command will be sending is Set Setting. This end point is used to update all of the settings on the camera. It is analogous to BLE commands like Set Video Resolution.
It is important to note that many settings are dependent on the video resolution (and other settings). For example, certain FPS values are not valid with certain resolutions. In general, higher resolutions only allow lower FPS values. Check the camera capabilities to see which settings are valid for given use cases.
Let’s build the endpoint first to set the Video Resolution to 1080 (the setting_id and option value comes from the command table linked above).
-
url = GOPRO_BASE_URL + f"/gopro/camera/setting?setting=2&option=9"response = requests.get(url) response.raise_for_status() -
response = wifi.get(GOPRO_BASE_URL + "gopro/camera/setting?setting=2&option=9")
Lastly, we print the response’s JSON data:
-
logger.info(f"Response: {json.dumps(response.json(), indent=4)}")This will log as such:
INFO:root:Setting the video resolution to 1080: sending http://10.5.5.9:8080/gopro/camera/setting?setting_id=2&opt_value=9 INFO:root:Command sent successfully INFO:root:Response: {} -
Timber.i(prettyJson.encodeToString(response))The response will log as such:
Setting Resolution to 1080
GET request to: http://10.5.5.9:8080/gopro/camera/setting?setting=2&option=9
{
}
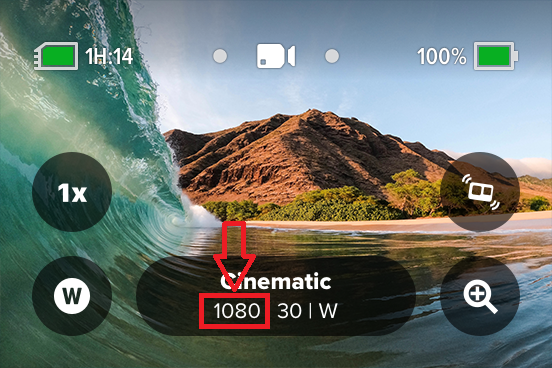
You should hear the camera beep and see the video resolution change to 1080 in the pill in the bottom-middle of the screen:

As a reader exercise, try using the Get Camera State command to verify that the resolution has changed.
Preview Stream
The next command we will be sending is Start Preview Stream. This command will enable (or disable) the preview stream . It is then possible to view the preview stream from a media player.
The commands write to the following endpoints:
| Command | Endpoint |
|---|---|
| start preview stream | /gopro/camera/stream/start |
| stop preview stream | /gopro/camera/stream/stop |
Let’s build the endpoint then send the GET request and check the response for errors. Any errors will raise an exception.
-
url = GOPRO_BASE_URL + "/gopro/camera/stream/start"response = requests.get(url) response.raise_for_status() -
TODO
Lastly, we print the response’s JSON data:
-
logger.info(f"Response: {json.dumps(response.json(), indent=4)}")This will log as such:
INFO:root:Starting the preview stream: sending http://10.5.5.9:8080/gopro/camera/stream/start INFO:root:Command sent successfully INFO:root:Response: {} -
TODO
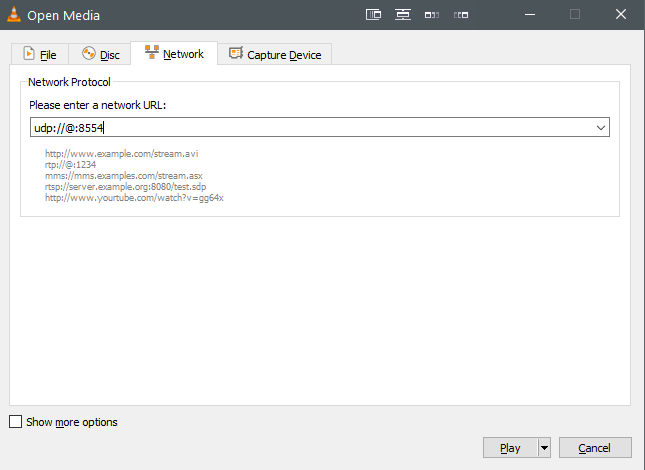
Once enabled, the stream can be viewed at udp://@:8554.
Here is an example of viewing this using VLC:
- Select Media–>Open Network Stream
- Enter the path as such:

- Select play
- The preview stream should now be visible.
Quiz time! 📚 ✏️
Troubleshooting
HTTP Logging
Wireshark can be used to view the HTTP commands and responses between the PC and the GoPro.
- Start a Wireshark capture on the WiFi adapter that is used to connect to the GoPro
- Filter for the GoPro IP address (10.5.5.9)

Good Job!
You can now send any of the HTTP commands defined in the Open GoPro Interface that return JSON responses. You may have noted that we did not discuss one of these (Get Media List) in this tutorial. Proceed to the next tutorial to see how to get and perform operations using the media list.
