Tutorial 1: Connect BLE
This tutorial will provide a walk-through to connect to the GoPro camera via Bluetooth Low Energy (BLE).
Requirements
Hardware
- A GoPro camera that is supported by Open GoPro
-
- One of the following systems:
- Windows 10, version 16299 (Fall Creators Update) or greater
- Linux distribution with BlueZ >= 5.43
- OS X/macOS support via Core Bluetooth API, from at least OS X version 10.11
- One of the following systems:
-
- An Android Device supporting SDK >= 33
Software
-
- Python >= 3.9 and < 3.12 must be installed. See this Python installation guide.
-
- Android Studio >= 2022.1.1 (Electric Eel)
Overview / Assumptions
-
This tutorial will use bleak to control the OS’s Bluetooth Low Energy (BLE).
The Bleak BLE controller does not currently support autonomous pairing for the BlueZ backend. So if you are using BlueZ (i.e. Ubuntu, RaspberryPi, etc.), you need to first pair the camera from the command line. One way to do this is to use bluetoothctl.The bleak module is based on asyncio which means that its awaitable functions need to be called from an async coroutine. In order to do this, all of the code below should be running in an async function. We accomplish this in the tutorial scripts by making main async as such:
import asyncio

async def main() -> None:
    # Put our code here

if __name__ == "__main__":
    asyncio.run(main())
These are stripped down Python tutorials that are only meant to show the basics. For a complete Python SDK that uses bleak as the backend as well as a cross-platform WiFi backend to easily write Python apps that control the GoPro, see the Open GoPro Python SDK -
This tutorial will provide a set of Kotlin tutorials to demonstrate Open GoPro Functionality. The tutorials are provided as a single Android Studio project targeted to run on an Android device.
The tutorials are only concerned with application-level demonstrations of the Open GoPro API and therefore do not prioritize the following:
- UI: The tutorial project only contains a minimal UI to select, implement, and view logs for each tutorial
- Android architecture / best practices: the project architecture is designed to encapsulate Kotlin functionality to easily display per-tutorial functionality
- Android-specific requirements: permission handling, adapter enabling, etc are implemented in the project but not documented in the tutorials
- BLE / Wifi (HTTP) functionality: A simple BLE API is included in the project and will be touched upon in the tutorials.
However, the focus of the tutorials is not on how the BLE API is implemented as a real project would likely
use a third-party library for this such as Kable
- See the Punchthrough tutorials for Android BLE-Specific tutorials
These tutorials assume familiarity and a base level of competence with:
Setup
-
This set of tutorials is accompanied by a Python package consisting of scripts separated by tutorial module. These can be found on Github. Once the Github repo has been cloned or downloaded to your local machine, the package can be installed as follows:
- Enter the python tutorials directory at
$INSTALL/demos/python/tutorial/where $INSTALL is the top level of the Open GoPro repo where it exists on your local machine - Use pip to install the package (in editable mode in case you want to test out some changes):
pip install -e .While it is out of the scope of this tutorial to describe, it is recommended to install the package in to a virtual environment in order to isolate system dependencies.You can test that installation was successful by viewing the installed package’s information:
$ pip show open-gopro-python-tutorials Name: open-gopro-python-tutorials Version: 0.0.3 Summary: Open GoPro Python Tutorials Home-page: https://github.com/gopro/OpenGoPro Author: Tim Camise Author-email: gopro.com License: MIT Location: c:\users\tim\gopro\opengopro\demos\python\tutorial Requires: bleak, requests Required-by: - Enter the python tutorials directory at
-
This set of tutorials is accompanied by an Android Studio project consisting of, among other project infrastructure, Kotlin files separated by tutorial module. The project can be found on Github. Once the Github repo has been cloned or downloaded to your local machine, open the project in Android studio.
At this point you should be able to build and load the project to your Android device.
The project will not work on an emulated device since BLE can not be emulated.
Just Show me the Demo!!
-
Each of the scripts for this tutorial can be found in the Tutorial 1 directory.
Python >= 3.9 and < 3.12 must be used as specified in the requirementsYou can test connecting to your camera through BLE using the following script:
python ble_connect.pySee the help for parameter definitions:
$ python ble_connect.py --help usage: ble_connect.py [-h] [-i IDENTIFIER] Connect to a GoPro camera, pair, then enable notifications. optional arguments: -h, --help show this help message and exit -i IDENTIFIER, --identifier IDENTIFIER Last 4 digits of GoPro serial number, which is the last 4 digits of the default camera SSID. If not used, first discovered GoPro will be connected to -
The Kotlin file for this tutorial can be found on Github.
To perform the tutorial, run the Android Studio project, select “Tutorial 1” from the dropdown and click on “Perform.”
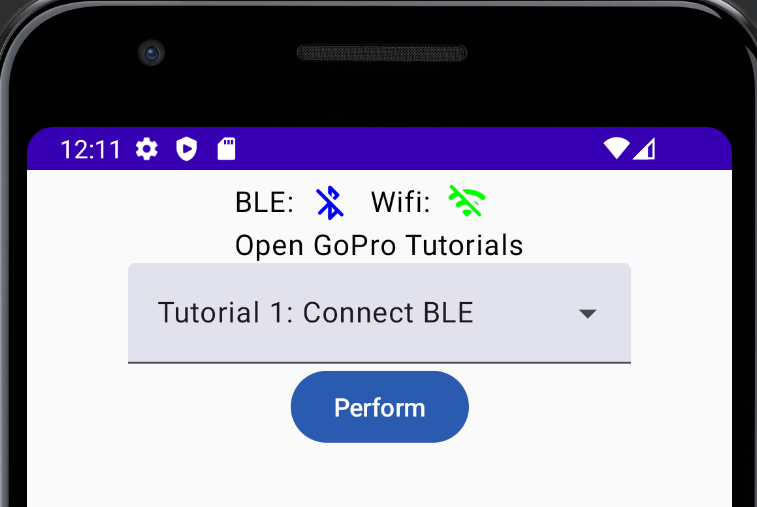
Perform Tutorial 1 This will start the tutorial and log to the screen as it executes. When the tutorial is complete, click “Exit Tutorial” to return to the Tutorial selection screen.
Basic BLE Tutorial
This tutorial will walk through the process of connecting to a GoPro via BLE. This same connect functionality will be used as a foundation for all future BLE tutorials.
Here is a summary of the sequence that will be described in detail in the following sections:
Advertise
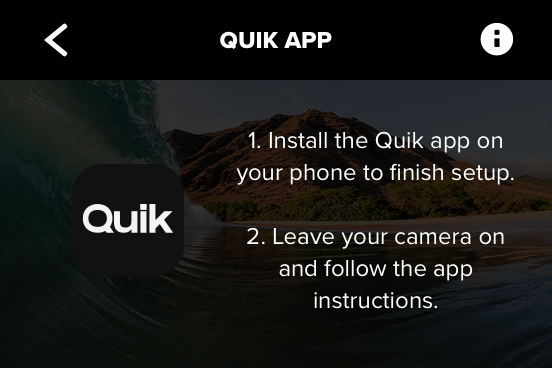
First, we need to ensure the camera is discoverable (i.e. it is advertising). Follow the per-camera steps here.
The screen should appear as such:
Scan
Next, we must scan to discover the advertising GoPro Camera.
-
We will do this using bleak. Let’s initialize an empty dict that will store discovered devices, indexed by name:
# Map of devices indexed by name
devices: Dict[str, BleakDevice] = {}
We’re then going to scan for all devices. We are passing a scan callback to bleak in order to also find non-connectable scan responses. We are keeping any devices that have a device name.
# Scan callback to also catch nonconnectable scan responses
def _scan_callback(device: BleakDevice, _: Any) -> None:
    # Add to the dict if not unknown
    if device.name and device.name != "Unknown":
        devices[device.name] = device


# Now discover and add connectable advertisements
for device in await BleakScanner.discover(timeout=5, detection_callback=_scan_callback):
    if device.name != "Unknown" and device.name is not None:
        devices[device.name] = device
Now we can search through the discovered devices to see if we found a GoPro. Any GoPro device name will be structured as
GoPro XXXXwhere XXXX is the last four digits of your camera’s serial number.If you have renamed your GoPro to something other than the default, you will need to update the below steps accordingly.First, we define a regex which is either “GoPro “ followed by any four alphanumeric characters if no identifier was passed, or the identifier if it exists. In the demo
ble_connect.py, the identifier is taken from the command-line arguments.token = re.compile(identifier or r"GoPro [A-Z0-9]{4}")Now we build a list of matched devices by checking if each device’s name includes the token regex.
matched_devices: List[BleakDevice] = []
# Now look for our matching device(s)
matched_devices = [device for name, device in devices.items() if token.match(name)]
Due to potential RF interference and the asynchronous nature of BLE advertising / scanning, it is possible that the advertising GoPro will not be discovered by the scanning PC in one scan. Therefore, you may need to redo the scan (as
ble_connect.pydoes) until a GoPro is found. That is,matched_devicemust contain at least one device.Similarly, connection establishment can fail for reasons out of our control. Therefore, the connection process is also wrapped in retry logic.
Here is an example of the log from
ble_connect.pyof scanning for devices. Note that this includes several rescans until the devices was found.$ python ble_connect.py INFO:root:Scanning for bluetooth devices... INFO:root: Discovered: INFO:root: Discovered: TR8600 seri INFO:root:Found 0 matching devices. INFO:root: Discovered: INFO:root: Discovered: TR8600 seri INFO:root: Discovered: GoPro Cam INFO:root: Discovered: GoPro 0456 INFO:root:Found 1 matching devices.Among other devices, you should see
GoPro XXXXwhere XXXX is the last four digits of your camera’s serial number. -
First let’s define a filter that will be used to find GoPro device advertisements. We do this by filtering on the GoPro Service UUID that is included in all GoPro advertisements:
private val scanFilters = listOf<ScanFilter>(
    ScanFilter.Builder().setServiceUuid(ParcelUuid.fromString(GOPRO_UUID)).build()
)
We then send this to the BLE API and collect events from the SharedFlow that it returns. We take the first event emitted from this SharedFlow and notify (via a Channel) that a GoPro advertiser has been found, store the GoPro’s BLE address, and stop the scan.
ble.startScan(scanFilters).onSuccess { scanResults ->
    val deviceChannel: Channel<BluetoothDevice> = Channel()
    // Collect scan results
    CoroutineScope(Dispatchers.IO).launch {
        scanResults.collect { scanResult ->
            // We will take the first discovered gopro
            deviceChannel.send(scanResult.device)
        }
    }
    // Wait to receive the scan result
    goproAddress = deviceChannel.receive().address
    ble.stopScan(scanResults)
}
At this point, the GoPro’s BLE address is stored (as a string) in
goproAddress.Here is an example log output from this process:
Scanning for GoPro's
Received scan result: GoPro 0992
Found GoPro: GoPro 0992
Connect
Now that we have discovered at least one GoPro device to connect to, the next step is to establish a BLE connection to the camera.
-
# We're just taking the first device if there are multiple.
device = matched_devices[0]
client = BleakClient(device)
await client.connect(timeout=15)
An example output of this is shown here where we can see that the connection has successfully been established as well as the GoPro’s BLE MAC address.:
INFO:root:Establishing BLE connection to EF:5A:F6:13:E6:5A: GoPro 0456... INFO:bleak.backends.dotnet.client:Services resolved for BleakClientDotNet (EF:5A:F6:13:E6:5A) INFO:root:BLE Connected! -
ble.connect(goproAddress)
At this point, the BLE connection is established but there is more setup to be done before we are ready to communicate.
Pair
The GoPro has encryption-protected characteristics which require us to pair before writing to them. Therefore now that we are connected, we need to attempt to pair.
-
try:
    await client.pair()
except NotImplementedError:
    # This is expected on Mac
    pass
Not all OS’s allow pairing (at this time) but some require it. Rather than checking for the OS, we are just catching the exception when it fails.
-
Rather than explicitly request pairing, we rely on the fact that Android will automatically start the pairing process if you try to read a characteristic that requires encryption. To do this, we read the Wifi AP Password characteristic.
First we discover all characteristics (this will also be needed later when enabling notifications):
ble.discoverCharacteristics(goproAddress)This API will discover the characteristics over-the-air but not return them here. They are stored to thebleobject for later access via theservicesOfmethod.Then we read the relevant characteristic to trigger pairing:
ble.readCharacteristic(goproAddress, GoProUUID.WIFI_AP_PASSWORD.uuid)At this point a pairing popup should occur on the Android Device. Select “Allow Pairing” to continue.
Here is an example log output from this process:
Discovering characteristics
Discovered 9 services for F7:5B:5D:81:64:1B
Service 00001801-0000-1000-8000-00805f9b34fb
Characteristics:
|--
Service 00001800-0000-1000-8000-00805f9b34fb
Characteristics:
|--00002a00-0000-1000-8000-00805f9b34fb: READABLE
|--00002a01-0000-1000-8000-00805f9b34fb: READABLE
|--00002a04-0000-1000-8000-00805f9b34fb: READABLE
...
|------00002902-0000-1000-8000-00805f9b34fb: EMPTY
|--b5f90082-aa8d-11e3-9046-0002a5d5c51b: WRITABLE
|--b5f90083-aa8d-11e3-9046-0002a5d5c51b: NOTIFIABLE
|------00002902-0000-1000-8000-00805f9b34fb: EMPTY
|--b5f90084-aa8d-11e3-9046-0002a5d5c51b: NOTIFIABLE
|------00002902-0000-1000-8000-00805f9b34fb: EMPTY
Service 00001804-0000-1000-8000-00805f9b34fb
Characteristics:
|--00002a07-0000-1000-8000-00805f9b34fb: READABLE
Pairing
Read characteristic b5f90003-aa8d-11e3-9046-0002a5d5c51b : value: 66:3F:54:2D:38:35:72:2D:4E:35:63
Once paired, the camera should beep and display “Connection Successful”.
Enable Notifications
As specified in the Open GoPRo BLE Spec, we must enable notifications for a given characteristic to receive responses from it.
To enable notifications, we loop over each characteristic in each service and enable the characteristic
for notification if it has notify properties:
-
It is necessary to define a notification handler to pass to the bleak
start_notifymethod. Since we only care about connecting to the device in this tutorial (and not actually receiving data), we are just passing an empty function. A future tutorial will demonstrate how to use this meaningfully.for service in client.services: for char in service.characteristics: if "notify" in char.properties: await client.start_notify(char, notification_handler)In the following example output, we can see that notifications are enabled for each characteristic that is notifiable.
INFO:root:Enabling notifications... INFO:root:Enabling notification on char 00002a19-0000-1000-8000-00805f9b34fb INFO:root:Enabling notification on char b5f90073-aa8d-11e3-9046-0002a5d5c51b INFO:root:Enabling notification on char b5f90075-aa8d-11e3-9046-0002a5d5c51b INFO:root:Enabling notification on char b5f90077-aa8d-11e3-9046-0002a5d5c51b INFO:root:Enabling notification on char b5f90079-aa8d-11e3-9046-0002a5d5c51b INFO:root:Enabling notification on char b5f90092-aa8d-11e3-9046-0002a5d5c51b INFO:root:Enabling notification on char b5f90081-aa8d-11e3-9046-0002a5d5c51b INFO:root:Enabling notification on char b5f90083-aa8d-11e3-9046-0002a5d5c51b INFO:root:Enabling notification on char b5f90084-aa8d-11e3-9046-0002a5d5c51b INFO:root:Done enabling notifications INFO:root:BLE Connection is ready for communication. -
ble.servicesOf(goproAddress).onSuccess { services ->
    services.forEach { service ->
        service.characteristics.forEach { char ->
            if (char.isNotifiable()) {
                ble.enableNotification(goproAddress, char.uuid)
            }
        }
    }
}
Here is an example log output from this process:
Enabling notifications
Enabling notifications for 00002a19-0000-1000-8000-00805f9b34fb
Wrote to descriptor 00002902-0000-1000-8000-00805f9b34fb
Enabling notifications for b5f90073-aa8d-11e3-9046-0002a5d5c51b
Wrote to descriptor 00002902-0000-1000-8000-00805f9b34fb
Enabling notifications for b5f90075-aa8d-11e3-9046-0002a5d5c51b
Wrote to descriptor 00002902-0000-1000-8000-00805f9b34fb
Enabling notifications for b5f90077-aa8d-11e3-9046-0002a5d5c51b
Wrote to descriptor 00002902-0000-1000-8000-00805f9b34fb
Enabling notifications for b5f90079-aa8d-11e3-9046-0002a5d5c51b
Wrote to descriptor 00002902-0000-1000-8000-00805f9b34fb
Enabling notifications for b5f90092-aa8d-11e3-9046-0002a5d5c51b
Wrote to descriptor 00002902-0000-1000-8000-00805f9b34fb
Enabling notifications for b5f90081-aa8d-11e3-9046-0002a5d5c51b
Wrote to descriptor 00002902-0000-1000-8000-00805f9b34fb
Enabling notifications for b5f90083-aa8d-11e3-9046-0002a5d5c51b
Wrote to descriptor 00002902-0000-1000-8000-00805f9b34fb
Enabling notifications for b5f90084-aa8d-11e3-9046-0002a5d5c51b
Wrote to descriptor 00002902-0000-1000-8000-00805f9b34fb
Bluetooth is ready for communication!
The characteristics that correspond to each UUID listed in the log can be found in the Open GoPro API. These will be used in a future tutorial to send data.
Once the notifications are enabled, the GoPro BLE initialization is complete and it is ready to communicate via BLE.
Quiz time! 📚 ✏️
Troubleshooting
Device not connecting
If the connection is not starting, it is likely because the camera is not advertising. This can be due to either:
- The camera is not in pairing mode. Ensure that this is achieved as done in the advertise section.
- The devices never disconnected from the previous session so are thus already connected. If this is the case, perform the “Complete System Reset” shown below.
Complete System Reset
BLE is a fickle beast. If at any point it is impossible to discover or connect to the camera, perform the following.
- Reset the camera by choosing Connections –> Reset Connections
- Use your OS’s bluetooth settings GUI to remove / unpair the Gopro
- Restart the procedure detailed above
Logs
-
The demo program has enabled bleak logs and is also using the default python logging module to write its own logs.
To enable more bleak logs, follow bleak’s troubleshooting section.
-
The demo program is using Timber. It is piping all log messages to the UI but they are also available in the logcat window and can be filtered using:
package:mine tag:GP_.
Good Job!
You can now successfully connect to the GoPro via BLE and prepare it to receive / send data. To see how to send commands, you should advance to the next tutorial.